Item Added To Your Cart
You are all set.We've reserved it just for you
Your cart is currently empty.
You are all set.We've reserved it just for you
Your cart is currently empty.


Just when you thought we were running out of tutorial ideas, BAM! We got six new styles to show you guys! SIX! As always, all of these styles are really quick and easy so even beginners can get the most professional and stylish looks without spending hours in a salon. Most of these styles look best natural, loose, and long. Get your Estelle’s Secret clip-ins ready to go and let’s get this party started!
* Just as a note, to apply your highlights, you will be working with 3 parts of your hair: each side and the back half of your head.
Let’s work with the back half first so go ahead and put the sides into an elastic band or clip to keep them out of the way.
* You will be using the three clip pieces for this section.
Ok, start by making a part at the bottom leaving out about an inch of your natural hair, pin up the rest while you apply the first three clip piece.
* If you have fine hair, before adding your first clip, lightly tease the roots and add a bit of hairspray for extra hold. This will help give the clips more grip and stay in place.
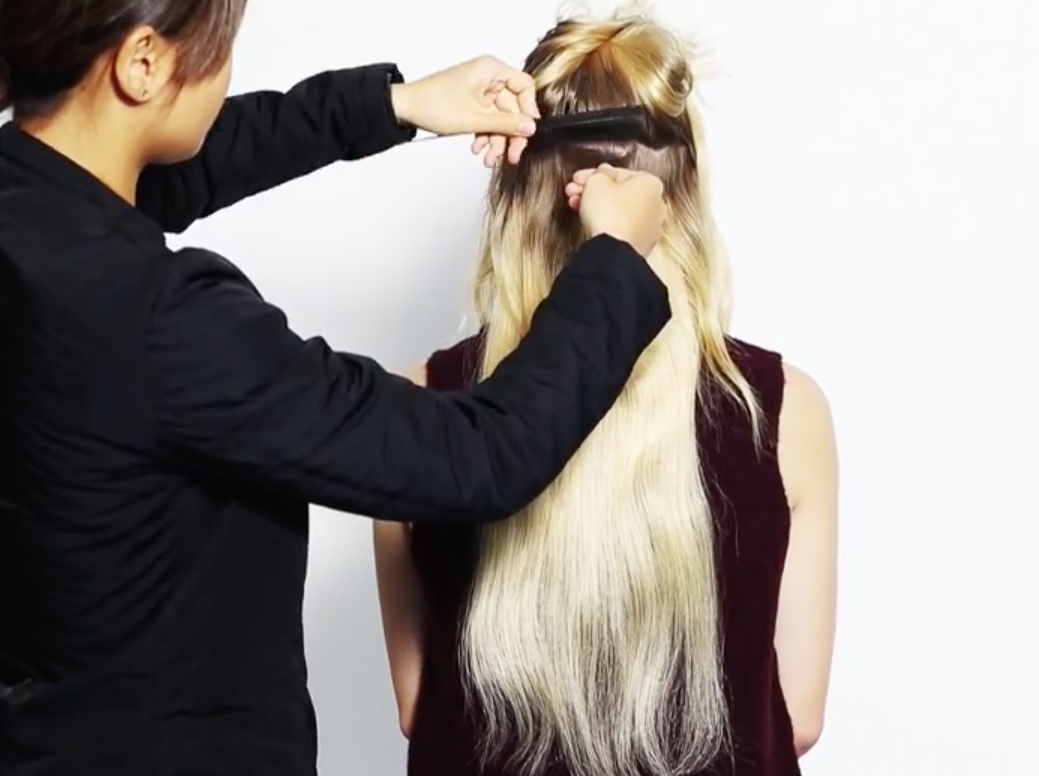 Step 3: Three-clip piece.
*I recommend brushing between each layer to help blend the extensions and your natural hair.
Add another layer of your natural hair.
Repeat this process until you have used all 4 three clip pieces.
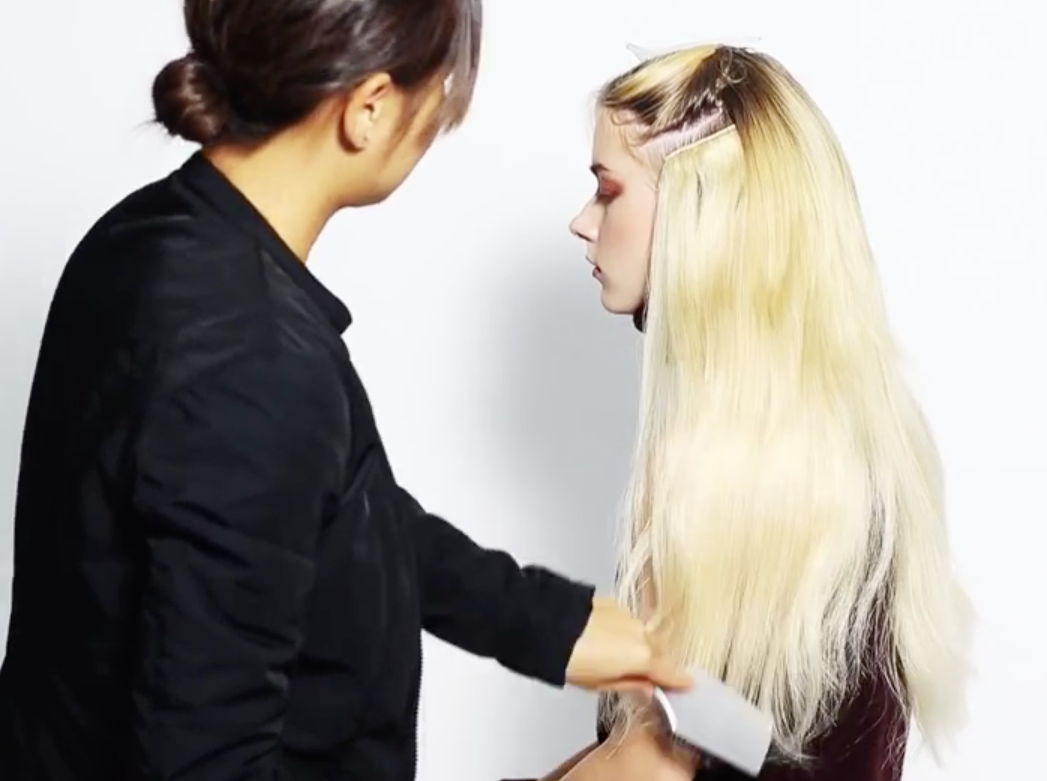
* Time to move to the sides! For each side, you will be using 1 two clip piece and 2 one clip pieces.
On one side, starting at the bottom, leave out a couple inches of your natural hair.
Apply 1 two-clip piece to your hair, don’t forget to brush between each layer!
Add another layer of your natural hair.
Apply a one clip piece, then add more of your natural hair, and finally one last one piece clip.
Repeat the same process on the remaining side.
Brush all the hair together blending all your together for a smooth and polished look!
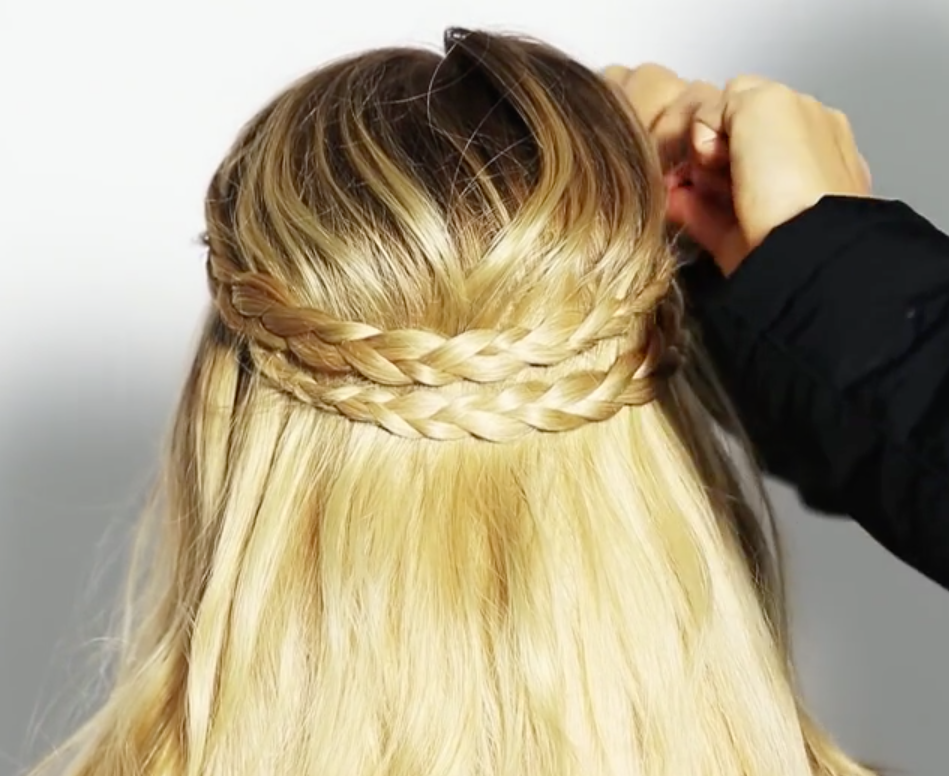
Make two medium small braids on each side of your head and secure the ends with an elastic band.
* leave some loose strands in the front to frame your face.
Now, take the end of right braid and hairpin it to the left side, then take the left braid and hairpin it to the right side.
The only thing left to do is to hide the hairpins and elastic bands underneath a bit of loose hair. All done!
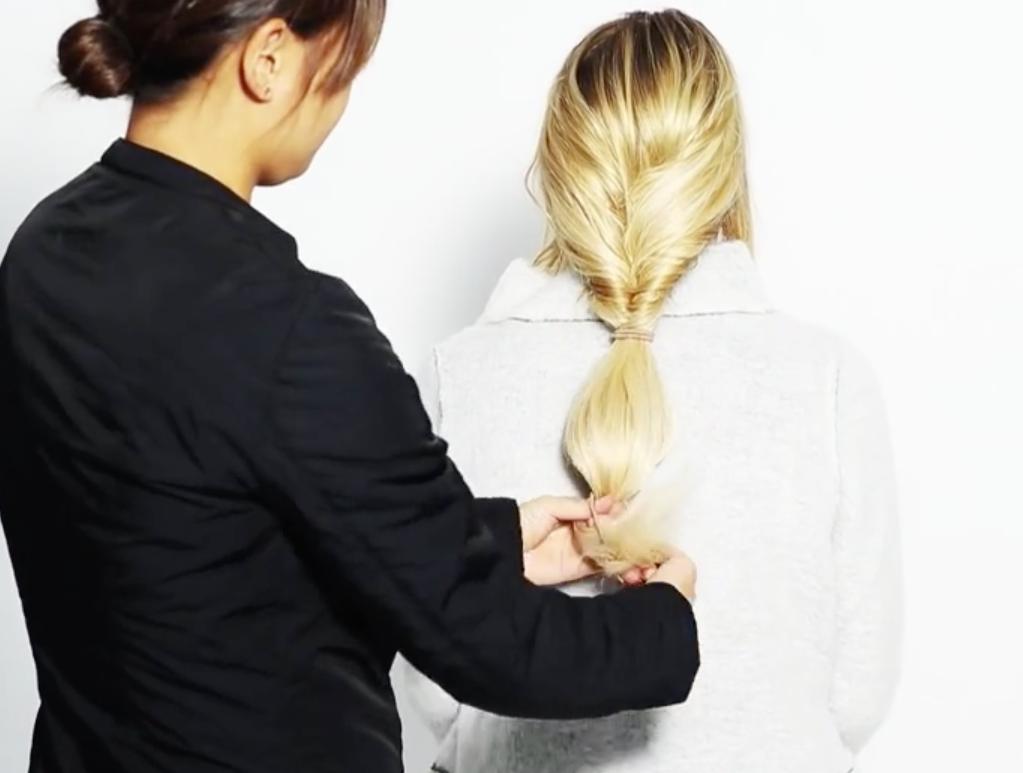
Bring all your hair back and make a loose braid all the way to the end and secure with an elastic band.
* leave out the shorter strands in the front to frame your face for a soft, messy look.
Tuck the end of your braid underneath itself so that the end is no longer visible.
Time to add your favorite hair clip which will further help to secure the tucked end and of course, add a pretty touch.
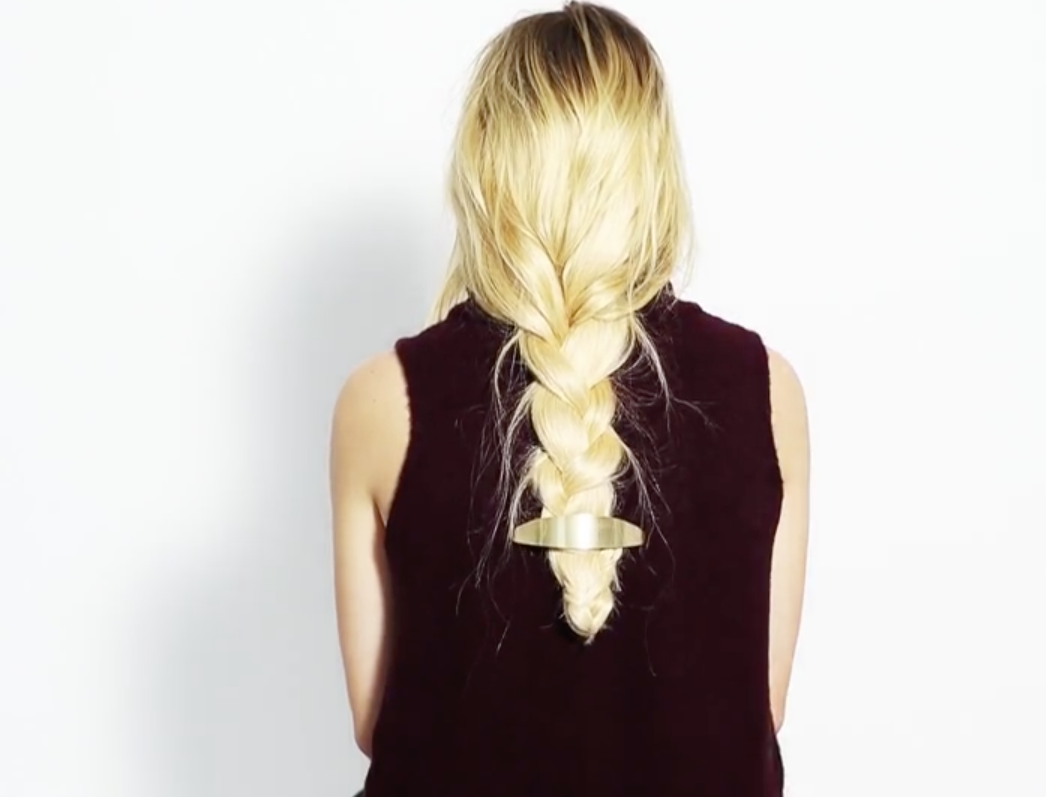
Use your fingers to loosen up your braid for a thicker appearance and bring out some loose strands for an effortless and modern style.
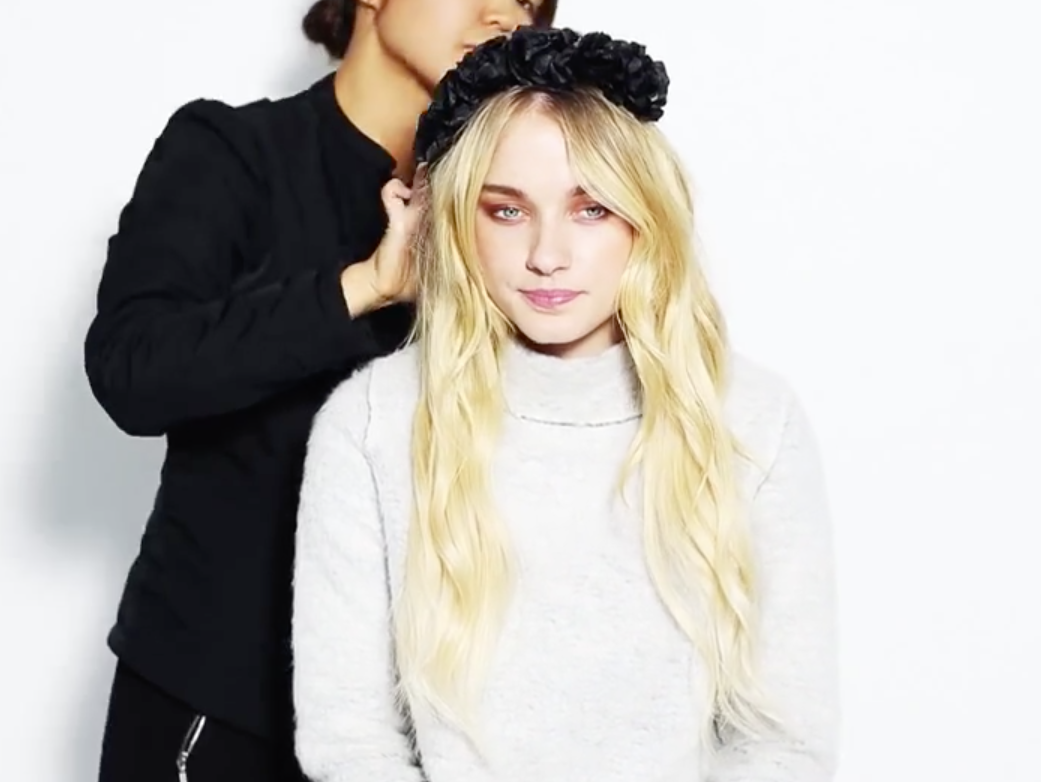
Simply adding a headband can take any loose hair style and add elegance. This look is worn best with day old texture and lots of hair framing the face.
* I really love flower headbands and Native American inspired headbands!
Start off by making a loose ponytail in the back.
Scoot the elastic down enough to create a space in the middle of your hair above the elastic band.
Loop the ponytail up and through the space and pull it down.
Loosen up the shape and secure it in the middle using hairpins.
Ok, now you’re going to make a second ponytail further down.
For this section of the ponytail, make another space above this elastic and loop it through just like you did in the top section of the ponytail. Now, loop it again for the second time.
Secure the shape with hairpins once more and add hairspray for extra hold.
Add your favorite accessory for a little extra flare!
Bring all of your hair to the long side and make yourself a big loose braid starting just below the chin area.

Add an elastic band to the end to keep the braid from unraveling.
Loosen up your messy braid for a thicker appearance leaving out stray hairs for an effortless look.
* OPTIONAL: Add a girly, chic headband to accent your pretty braid.
Well ladies, there you have it! Six quick and easy styles for almost every day of the week! Don’t forget to subscribe to Estelle’s Secret for the best clip-in extension deals and tutorials.
Blispay makes shopping at Estelle's Secret even easier. It's the only payment option that gives you:
No Payments, No Interest on purchases over $199 if paid in full in 6 months.
Blispay gives you 2% Cash Back on all purchases and works everywhere Visa is accepted.
APPLY NOW AT BLISPAY.COM