Item Added To Your Cart
You are all set.We've reserved it just for you
Your cart is currently empty.
You are all set.We've reserved it just for you
Your cart is currently empty.
I’m going to show you some really quick styles you can use for any event. Whether it’s a business luncheon, romantic date, or a night on the town with friends, I got your back!
Hey, lovelies! So, I definitely don’t indulge in celebrity related events and award shows but I do look at them every here and there. Is it me or do you ever find yourself wondering how they are able to completely change their look several times during the course of the event? Like seriously, they come out with a new outfit, new makeup, and new hairdo!
Well, believe it or not, switching up hairstyles that fast isn’t as mind-boggling as one would think! I’m going to show you some really quick styles you can use for any event. Whether it’s a business luncheon, romantic date, or a night on the town with friends, I got your back! You already know our human hair clip-in extensions are super versatile but you need to check out these four modern and creative hairdos. They are so fun, easy and fast, you seriously can’t go wrong with any of them!

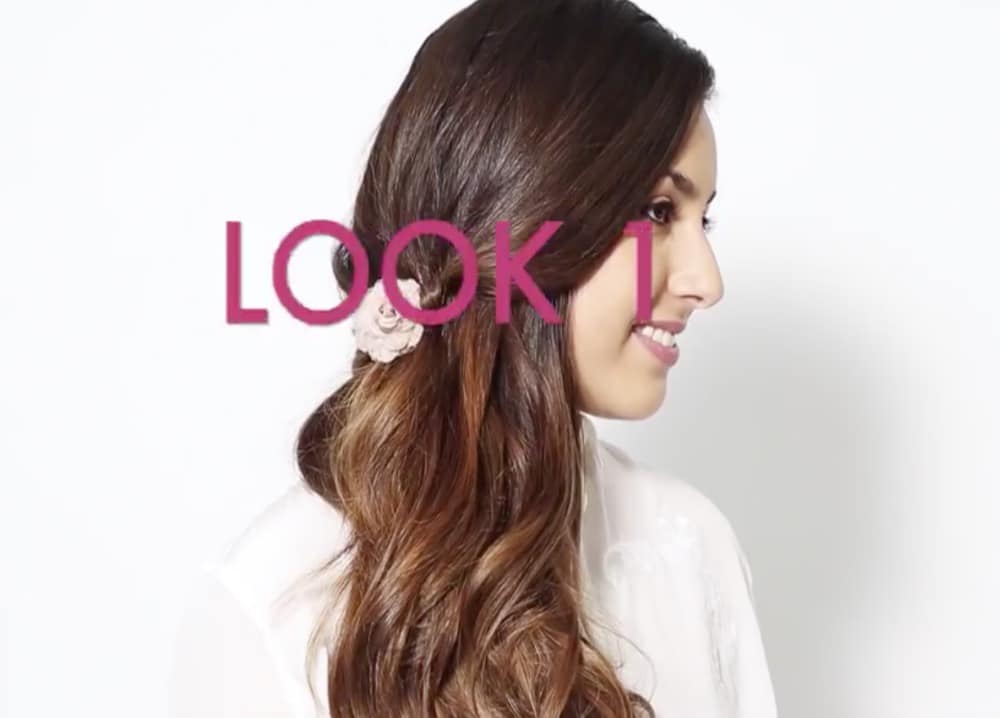
Let’s start by bringing all of your hair to one side, whichever side you prefer.
Grab two small sections of hair from both sides of your hair and connect them in the middle using a small elastic band.
* I would take these sections from the top area of hair but I think it’s all about making it your own so you can experiment a bit.
Alright, now bring out a small section of hair from your newly made mini-ponytail.
Loop it over the elastic and secure it by attaching it to another small piece of hair from your ponytail, with an elastic band.
*You’re basically using it as a creative way to cover the elastic but it’s also super cute.
Now just play around and loosen up the end of your ponytail by hand a little bit.
The only thing left is to apply a bit of hairspray and place your hair accessory beneath the loop in the middle of your mini-ponytail.

First, you need to divide your hair into two vertical sections.
Go on and place the right section in front of your shoulder just to get it out the way for a moment. You can put a clip or elastic band on it if you want.
Now, loosely braid the left section of your hair and put an elastic band on the end so it doesn’t unravel.
Ok, for the right side, bring it back down and make a loose twist rather than a braid. Of course, secure the end with an elastic band.
* This next step is a little bit tricky but once you do it, you’ll realize how simple it is and why you never thought of it before, lol! The video can help you if you need further guidance.
Take the braid on the left side and stick it through the twist on the right side. Go back through the twist maybe three or four times. How cool does that look!
Once you get towards the end, carefully remove both of those elastic bands and put the ends together with one elastic band.
Tuck the end of your ponytail under a few inches and use a hair pin to keep it in place.
Finishing touches!
* I think a hair accessory will look really nice in the middle of this cool braid twist up there around the neck length area.
* Loosen it up to give it a fuller, lifted appearance.

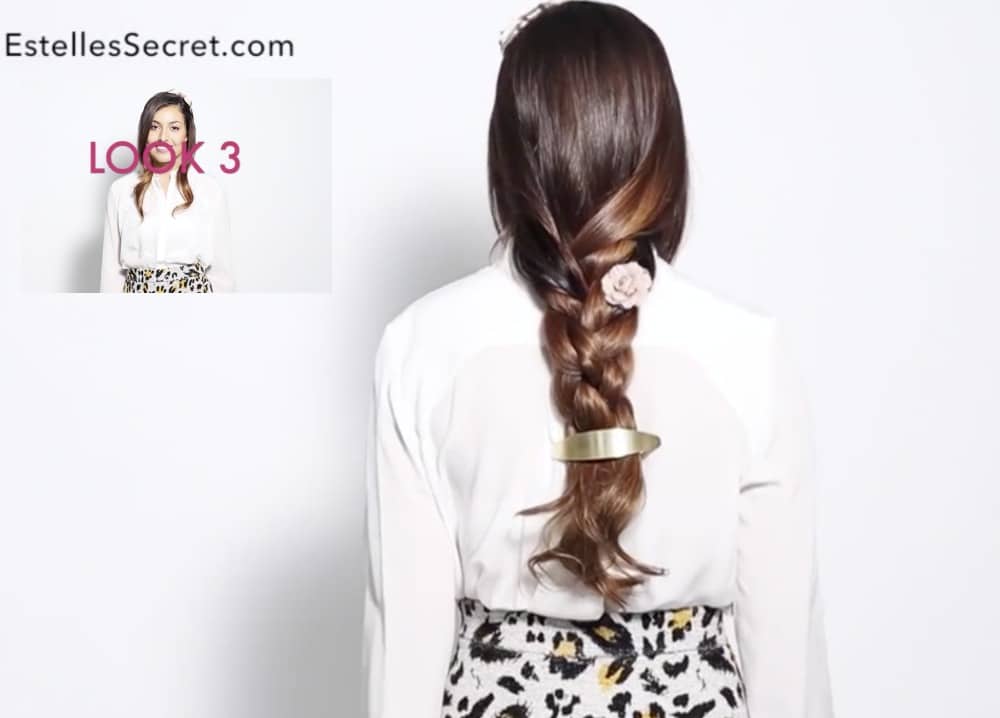
Divide your hair into three equal vertical sections.
Twist each section loosely and put an elastic band at the end.
* For me it was easier to do one section at a time. So, I would take one section and twist it, then the second section and twist it, you get my drift! Either way works fine.
When you’re done with all three of your twists, use the three twists to make a braid. Isn’t this a great way to turn a simple braid into a thick, voluminous braid, I love it!
Remove all the elastic bands at the ends and put the ends together using one elastic band or a big hair accessory that can hold all that hair!
Add any extra hair accessories and as always, loosen up the braid so it’s nice and full.

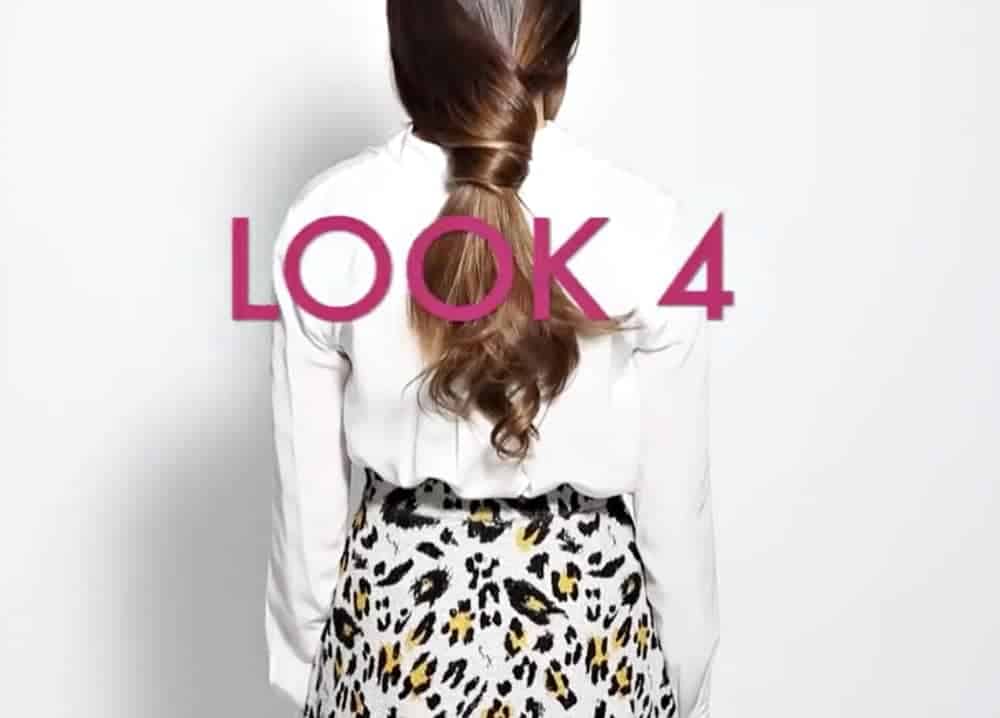
This style starts by making a diagonal low ponytail using about a third of your hair.
* The hair left should be located on one side and towards the bottom. Check out the video tutorial if you need a little more guidance.
Now, take your remaining hair and simply wrap it around the ponytail twice.
You can secure the end by attaching it to another small section of hair from the ponytail using an elastic band.
* Try to hide the elastic behind the ponytail, it won’t look as nice if it’s peeking out the side, lol.
Tease your ponytail for volume and add a touch of hairspray!
Final step, add any accessories and your own flare to complete this stylish ponytail!
I sincerely hope you guys enjoyed these tutorials, I just had to share them with you. They are all so simple (especially those last two, right?!) and cute! I like to keep an index of all my hairstyles by taking a picture and saving it in an album on my phone. This way you can easily look them back up and see which one you want to do for the day or night. Of course, be sure to check back here at Estelle’s Secret if that’s not an option and to keep up on all the new styles we have to show you!
Thanks for following along and don’t forget to subscribe.
It’s super long, super high, and super thick. It also happens to be the signature style for a top celebrity that for most people...
3 Comments
Read MoreSelena Gomez has some of the most gorgeous celebrity hair! It’s so thick, shiny, and always slaying the hair game. One of her...
4 Comments
Read MoreKim Kardashian’s hair gives most of us ladies some serious hair envy. It is always on point! Whether she wears it straight, i...
269 Comments
Read MoreBraided in the front, curls in the back—this is a classic romantic look! You can achieve it with a little bit of patience and...
COMBINED FISHTAIL BRAID So, if you’ve never done a fishtail braid before, it can be a little intimidating but after you finis...
3 Comments
Read MoreLet me just tell you, you are about to get some serious cool points from your friends for this professional looking braid. Not ...
1 Comments
Read MoreSo, someone’s getting married, and you want to look your bridal best. If you’re looking for the perfect wedding up-do, we�...
1 Comments
Read MoreEven though this is a fall-inspired style, this ponytail is stylish enough to wear any season, any day, and for any occasion! B...
Fall is a time for change. Leaves changing colors, tank tops to hoodies, iced lattes to pumpkin spiced, you get the idea! It’...
Ok, I get it! Sometimes curling your own hair can take up enough time without having to worry about curling your hair extensions t...
If you have gorgeous, thick and voluminous hair, this tutorial is not for you, lol! Let’s face it, not all of us were blessed...
1 Comments
Read MoreYou don’t have to wait six months to have long hair! If you’ve been trying to grow your hair it out a while, but you’re r...
Have you ever instantly regretted a do-it-yourself hair color treatment—especially going from dark to light? Maybe that sandy...
167 Comments
Read MoreAt one point, half-up styles took a back seat when it came to hairstyles but lately they have been super trendy and super hot! Par...
2 Comments
Read MoreReal talk ladies, we’ve all been there! You wake up late, you throw on some clothes, and look in the mirror and think “what...
1 Comments
Read MoreJust when you thought we were running out of tutorial ideas, BAM! We got six new styles to show you guys! SIX! As always, all o...
Sometimes it’s easy to forget but I am here to remind you that within each of you lies a goddess. A goddess that is uniquely ...
4 Comments
Read MoreLet’s take a trip down memory lane and remember all the glory of the 1960’s. True, it did have some pretty conflicted event...
6 Comments
Read MoreHello, ladies, I am back with this popular go-to style that takes about 3 minutes and can be worn in many different ways from a...
2 Comments
Read MoreHey, lovelies! So, I definitely don’t indulge in celebrity related events and award shows but I do look at them every here an...
3 Comments
Read MoreEvery now and again, I get caught up with work or family and fail to even realize how completely boring my hair routine has got...
219 Comments
Read MoreHave you ever done the fry-and-chop? Your friend had some flirty summer highlights, and you wanted to try them for yourself. Yo...
1 Comments
Read MoreWe all know it takes (seemingly) FOREVER to grow hair out. Maybe you wanted a drastic change, so you chopped it all off. And wh...
Want to volumize and lengthen your hair? Try hair extensions! You can make it happen in under an hour, and we’re going to sho...
Overwhelmed by the idea of trying hair extensions for the first time? Don’t be afraid—volume can be yours in less than an h...
Are you guys ready for some great new hairstyles to show off? I hope so because I have three unique options for you to learn th...
6 Comments
Read MoreBlispay makes shopping at Estelle's Secret even easier. It's the only payment option that gives you:
No Payments, No Interest on purchases over $199 if paid in full in 6 months.
Blispay gives you 2% Cash Back on all purchases and works everywhere Visa is accepted.
APPLY NOW AT BLISPAY.COM