Double Dutch Braid Styles: 8 Epic Pinterest Ideas and 30 Tutorials

Double Dutch Braid Styles: 8 Epic Pinterest Ideas and 30 Tutorials

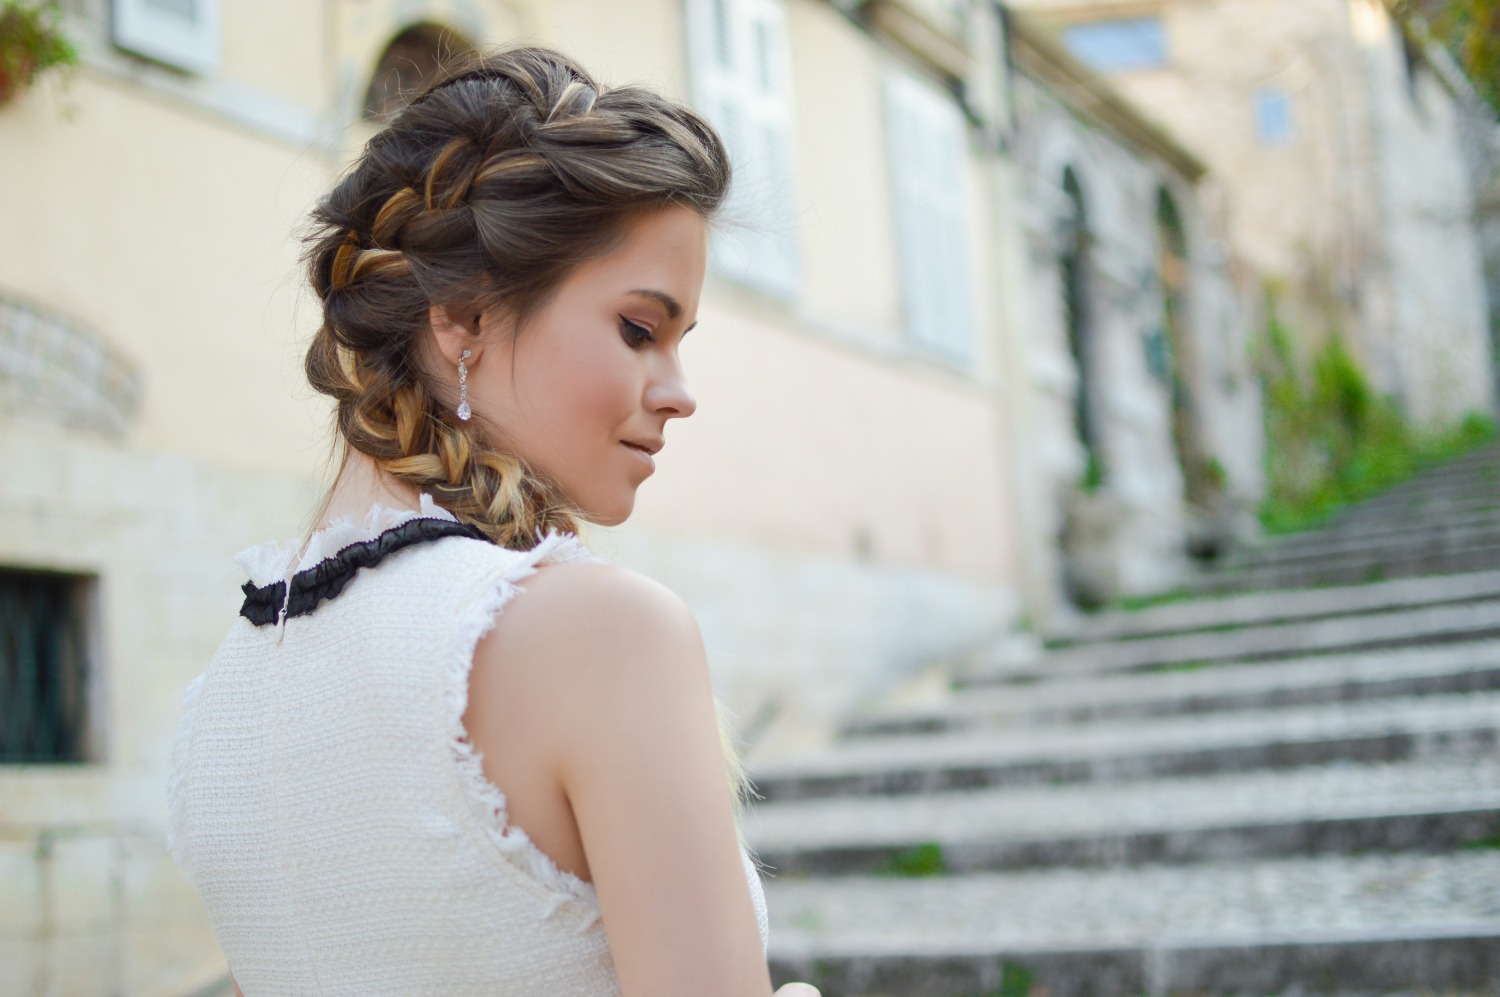
The Double Dutch Braid trend has been going strong and we can definitely see why. First of all, they are incredibly versatile, rather easy to accomplish, and they are so much cooler than the typical french braid! Double Dutch Braid styles have literally taken over the internet. We have searched far and wide to present you with the best double dutch hairstyles. We are also treating you to 30 double dutch braid hair tutorials. Now, if you do prefer the more classic look, you can also use these as french braid tutorials as well. 

8 Epic Double Dutch Braid Pinterest Ideas

Image Source: Pinterest

Image Source: Pinterest

Image Source: Pinterest

Image Source: Pinterest

Image Source: Pinterest

Image Source: Pinterest

Image Source: Pinterest

Image Source: Pinterest

30 Double Dutch Braid Hair Tutorials

The Original Double Dutch Braid Tutorial

Image Source: Pinterest

  1. Brush your hair out thoroughly and create a center part extending all the way down to the back of your head.
  2. Use an elastic band to keep the left side out of the way so you can concentrate on the right side for now.
  3. Starting at the top corner of the right side, pick up three small sections of hair to begin your braid.
  4. Begin braiding by crossing first the right strand under the middle and then the left strand under the middle.
  5. Add more hair as you go, all the way to the end of the hair.
  6. Secure the end using an elastic band.
  7. Repeat the same steps on the left side.
  8. Apply hairspray to keep your double dutch braids looking fresh and stylish all day long!

Double Dutch Braid Space Bun Tutorial

Image Source: Pinterest

  1. Brush your hair out thoroughly and create a center part extending all the way down to the back of your head.
  2. Use an elastic band to keep the left side out of the way so you can concentrate on the right side for now.
  3. At the back of the right side, section a small piece and split it into three parts to start the braid.
  4. Moving up your head, cross the side sections back and forth under the middle section.
  5. Add more hair as you go.
  6. Don’t worry if the braids are not perfect, it will add a chic quality to your style.
  7. Once you reach a little past the top of your ear, pull all the hair on the right side together and form a bun.
  8. Secure with an elastic band and use hairpins to place any unwanted stray hairs.
  9. Repeat the same steps on the left side.
  10. Add hairspray to keep your double dutch braids looking fresh and stylish all day long!

Double Dutch Braid Sisters Tutorial

Image Source: Instagram

  1. Brush your hair out thoroughly and create a center part extending all the way down to the back of your head.
  2. Use an elastic band to keep the left side out of the way so you can concentrate on the right side for now.
  3. Starting at the top corner of the right side, pick up three small sections of hair to begin your braid.
  4. Begin braiding by crossing first the right strand under the middle and then the left strand under the middle.
  5. Add more hair as you move along.
  6. Once you reach the end of your scalp, secure the braid with an elastic band.
  7. Now, braid the left side the same way stopping when you reach the nape of your neck.
  8. Hold the braid with one hand to prevent it from unraveling and carefully remove the elastic band on the right side.
  9. Use the elastic band to secure both sides together.
  10. Use your fingers to loosen the braids for volume and tease the ponytail for a trendy finish.
  11. Add hairspray to keep your double dutch braids looking fresh and stylish all day long!

Pancaked Double Dutch Braid Tutorial

Image Source: Pinterest

  1. Brush your hair out thoroughly and create a center part extending all the way down to the back of your head.
  2. Use an elastic band to keep the left side out of the way so you can concentrate on the right side for now.
  3. Starting at the top corner of the right side, pick up three small sections of hair to begin your braid.
  4. Begin braiding by crossing first the right strand under the middle and then the left strand under the middle.
  5. Adding more hair as you move along, all the way to the end of the hair.
  6. Secure the end using an elastic band.
  7. Repeat the same steps on the left side.
  8. Using your fingers, loosen and pull out the braids for a messy and mega voluminous look.
  9. Use hairpins to hold pieces flat and in place.
  10. This “pancake” effect is great for making thin hair look ultra thick.
  11. Apply hairspray to keep your double dutch braids looking fresh and stylish all day long!

Bohemian Double Dutch Braid Tutorial

Image Source: Pinterest

  1. Brush your hair out thoroughly and create a center part extending all the way down to the back of your head.
  2. Use an elastic band to keep the left side out of the way so you can concentrate on the right side for now.
  3. Starting at the top corner of the right side, pick up three small sections of hair to begin your braid.
  4. Begin braiding by crossing first the right strand under the middle and then the left strand under the middle.
  5. Add more hair as you move along.
  6. Once you reach the end of your scalp, secure the braid with an elastic band.
  7. Now, braid the left side the same way stopping when you reach the nape of your neck.
  8. Secure with another elastic band.
  9. For each side, take a few strands of hair and wrap it around the elastic band.
  10. Secure it in the back using a hairpin.
  11. Braid the remaining hair, securing the ends with an elastic band.
  12. Using your fingers, loosen and pull out the braids for a fuller, messier look.
  13. Apply hairspray to keep your double dutch braids looking fresh and stylish all day long!

Bohemian Fishtail Double Dutch Braid Tutorial

Image Source: Pinterest

  1. Brush your hair out thoroughly and create a center part extending all the way down to the back of your head.
  2. Use an elastic band to keep the left side out of the way so you can concentrate on the right side for now.
  3. Starting at the top corner of the right side, pick up three small sections of hair to begin your braid.
  4. Begin braiding by crossing first the right strand under the middle and then the left strand under the middle.
  5. Add more hair as you move along.
  6. Once you reach the end of your scalp, secure the braid with an elastic band.
  7. Now, braid the left side the same way stopping when you reach the nape of your neck.
  8. Secure with another elastic band.
  9. For each side, take a few strands of hair and wrap it around the elastic band.
  10. Secure it in the back using a hairpin.
  11. With the remaining hair, create a fishtail braid on each side.
  12. Secure the ends with an elastic band.
  13. Using your fingers, loosen and pull out the braids for a fuller, messier look.
  14. Apply hairspray to keep your double dutch braids looking fresh and stylish all day long!

Double Dutch Braid Hun Tutorial

Image Source: Pinterest

  1. Brush your hair out thoroughly and section off the front middle section of your hair.
  2. Leave two to three inches out on the sides, going back just past the ears.
  3. You will be working with this middle section so use an elastic band to keep the remaining hair out of the way.
  4. Split the middle section into two parts and clip one side out of the way.
  5. Begin braiding the first section by crossing the right strand under the middle and then the left strand under the middle.
  6. Add more hair as you move along.
  7. Once you reach the end of the section, secure the braid with an elastic band.
  8. Now, braid the other side the same way and secure with an elastic band.
  9. Take the ponytail at the end of each braid and fashion it into a bun.
  10. Use hairpins to secure the buns and hold down any unwanted flyaways.
  11. Add hairspray to keep your double dutch braids looking fresh and stylish all day long!

Double Dutch Braid Sisters Bun Tutorial

Image Source: Pinterest

  1. Brush your hair out thoroughly and create a center part extending all the way down to the back of your head.
  2. Use an elastic band to keep the left side out of the way so you can concentrate on the right side for now.
  3. Starting at the top corner of the right side, pick up three small sections of hair to begin your braid.
  4. Begin braiding by crossing first the right strand under the middle and then the left strand under the middle.
  5. Add more hair as you move along.
  6. Once you reach the end of your scalp, secure the braid with an elastic band.
  7. Now, braid the left side the same way stopping when you reach the nape of your neck.
  8. Hold the braid with one hand to prevent it from unraveling and carefully remove the elastic band on the right side.
  9. Use it to secure both sides together.
  10. Form the ponytail into a large, voluminous, messy bun.
  11. Add hairspray to keep your double dutch braids looking fresh and stylish all day long!

Double Dutch Braided Sisters Tutorial

Image Source: Pinterest

  1. Brush your hair out thoroughly and create a center part extending all the way down to the back of your head.
  2. Use an elastic band to keep the left side out of the way so you can concentrate on the right side for now.
  3. Starting at the top corner of the right side, pick up three small sections of hair to begin your braid.
  4. Begin braiding by crossing first the right strand under the middle and then the left strand under the middle.
  5. Add more hair as you move along.
  6. Once you reach the end of your scalp, secure the braid with an elastic band.
  7. Now, braid the left side the same way stopping when you reach the nape of your neck.
  8. Hold the braid with one hand to prevent it from unraveling.
  9. Carefully remove the elastic band on the right side and braid both sides together.
  10. Braid all the way to the end and secure with an elastic band.
  11. Add hairspray to keep your double dutch braids looking fresh and stylish all day long!

Open Ended Double Dutch Braids Tutorial

Image Source: Instagram

  1. Brush your hair out thoroughly and create a center part extending all the way down to the back of your head.
  2. Use an elastic band to keep the left side out of the way so you can concentrate on the right side for now.
  3. Starting at the top corner of the right side, pick up three small sections of hair to begin your braid.
  4. Begin braiding by crossing first the right strand under the middle and then the left strand under the middle.
  5. Add more hair as you move along.
  6. Once you reach the end of your scalp, secure the braid with an elastic band.
  7. Now, braid the left side the same way stopping when you reach the nape of your neck.
  8. Secure with another elastic band.
  9. For each side, take a few strands of hair and wrap it around the elastic band.
  10. Secure it in the back using a hairpin.
  11. Tease the ponytails or curl for a trendy finish.
  12. Add hairspray to keep your double dutch braids looking fresh and stylish all day long!

Double Dutch Braid Crown Tutorial

Image Source: Instagram

  1. Brush your hair out thoroughly and create a center part extending all the way down to the back of your head.
  2. Use an elastic band to keep the left side out of the way so you can concentrate on the right side for now.
  3. Starting at the top corner of the right side, pick up three small sections of hair to begin your braid.
  4. Begin braiding by crossing first the right strand under the middle and then the left strand under the middle.
  5. Add more hair as you move along all the way to the end of the hair.
  6. Secure the end using an elastic band.
  7. Repeat the same steps on the left side.
  8. Take the ends of each braid and stretch them to the opposite side layering them neatly one on top of the other.
  9. Tuck the ends into the braid and secure using hairpins.
  10. Apply hairspray to keep your double dutch braids looking fresh and stylish all day long!

Double Dutch Braided Rose Bun Sisters Tutorial

Image Source: Instagram

  1. Brush your hair out thoroughly and create a center part extending all the way down to the back of your head.
  2. Use an elastic band to keep the left side out of the way so you can concentrate on the right side for now.
  3. Starting at the top corner of the right side, pick up three small sections of hair to begin your braid.
  4. Begin braiding by crossing first the right strand under the middle and then the left strand under the middle.
  5. Add more hair as you move along all the way to the end of the hair.
  6. Secure the end using an elastic band.
  7. Repeat the same steps on the left side.
  8. Take the ends of each braid and form a circular pattern in the back.
  9. Secure with hairpins as you place the braids.
  10. Using your fingers, carefully loosen the braids for a messy and voluminous rose bun.
  11. Apply hairspray to keep your double dutch braids looking fresh and stylish all day long!


Bejeweled Double Dutch Braid Tutorial

Image Source: Instagram

  1. Brush your hair out thoroughly and create a center part extending all the way down to the back of your head.
  2. Use an elastic band to keep the left side out of the way so you can concentrate on the right side for now.
  3. Starting at the top corner of the right side, pick up three small sections of hair to begin your braid.
  4. Begin braiding by crossing first the right strand under the middle and then the left strand under the middle.
  5. Add more hair as you move along all the way to the end of the hair.
  6. Secure the end using an elastic band.
  7. Repeat the same steps on the left side.
  8. Add your favorite stylish beads, hairpins, and hair jewelry!
  9. Apply hairspray to keep your double dutch braids looking fresh and stylish all day long!

Double Dutch Ribbon Braid Tutorial

Image Source: Instagram

  1. Brush your hair out thoroughly and create a center part extending all the way down to the back of your head.
  2. Use an elastic band to keep the left side out of the way so you can concentrate on the right side for now.
  3. Starting at the top corner of the right side, find the middle of your ribbon and hairpin it to the center.
  4. Pick up three small sections of hair to begin your braid, including each side of the ribbon in the left and right sections of hair.
  5. Begin braiding by crossing first the right section under the middle and then the left section under the middle.
  6. Add more hair as you move along, all the way to the end of the hair.
  7. Secure the end using an elastic band. Cut any ribbon left hanging or use it to create a bow at the ends.
  8. Repeat the same steps on the left side.
  9. Apply hairspray to keep your double dutch braids looking fresh and stylish all day long!

Double Dutch Waterfall Merged Braid Tutorial

Image Source: Pinterest

  1. Brush your hair out thoroughly and create a vertical about 3 inches from the forehead, down from the part to the left ear.
  2. Use an elastic band to keep the front part of your hair out of the way.
  3. Now, create a second part from the back of the crown down towards the nape of the neck on the left side.
  4. Clip this section away as well.
  5. Next, take a section of hair, near the part, of the middle section of hair.
  6. Pick up three small sections of hair and create a waterfall braid down to the nape of the neck.
  7. Next, take the front clipped section of hair and create a dutch braid.
  8. Add in the first braid when you get further down.
  9. Secure the combined braid using an elastic band.
  10. Finally, bring down the back section and create another dutch braid that trails from the back of the head on the right side, around the back of the head, and towards the left ear.
  11. Pull in the first braid once they line up and continue braiding down into a regular side braid.
  12. Secure the ends with an elastic band.
  13. Using your fingers, loosen and pull out the braids for a fuller, messier look.
  14. Apply hairspray to keep your double dutch braids looking fresh and stylish all day long!

Double Dutch Braid Half and Half Tutorial

Image Source: Pinterest

  1. Brush your hair out thoroughly and create a center part extending all the way down to the back of your head.
  2. Gather the top one-fourth center section of hair and clip away the rest out of the way.
  3. Starting at the top corner of the right side, pick up three small sections of hair to begin your braid.
  4. Begin braiding by crossing first the right strand under the middle and then the left strand under the middle.
  5. Add more hair as you move along.
  6. Position the braid towards the far side of the section instead of the middle.
  7. Continue braiding all the way until you reach the end of the section and then secure the braid using a clip.
  8. Repeat the same steps with the other section of hair.
  9. Use an elastic band to tie the braids together.
  10. Take a small section from the resulting ponytail and wrap the elastic band securing it in the back with a hairpin.
  11. Apply hairspray to keep your double dutch braids looking fresh and stylish all day long!

Game of Thrones Inspired Double Dutch Braid Tutorial

Image Source: Popsugar

  1. Brush your hair out thoroughly and create a center part extending all the way down to the back of your head.
  2. Gather the top one-fourth center section of hair and clip away the rest out of the way.
  3. Starting at the top corner of the right side, pick up three small sections of hair to begin your braid.
  4. Begin braiding by crossing first the right strand under the middle and then the left strand under the middle.
  5. Add more hair as you move along.
  6. Position the braid towards the far side of the section instead of the middle.
  7. Continue braiding all the way until you reach the end of the section and then secure the braid using a clip.
  8. Repeat the same steps with the other section of hair.
  9. Use an elastic band to tie the braids together.
  10. Take a small section from the resulting ponytail and wrap the elastic band.
  11. Secure it in the back with a hairpin.
  12. Start the second tier by gathering a horizontal section from right above the ear. Clip the remaining hair out of the way.
  13. Create another double dutch braid on each side.
  14. Bring them together along with the previous top section using an elastic band.
  15. Slide the elastic down a couple of inches.
  16. Again, using a small section of your ponytail, hide the elastic band by wrapping it around.
  17. Secure in the back with a hairpin.
  18. Use your fingers to loosen the braids a bit for a voluminous and messy look.
  19. Apply hairspray to keep your double dutch braids looking fresh and stylish all day long!

Double Dutch 4-Part Ponytail Tutorial

Image Source: Pinterest

  1. Brush your hair out thoroughly and create a center part extending all the way down to the back of your head.
  2. Now, create a horizontal part from ear to ear. The result should be four equal sections of hair.
  3. Use an elastic band to keep the left sections and bottom right section out of the way.
  4. Starting at the top center of the right side, pick up three small sections of hair to begin your braid.
  5. Begin braiding by crossing first the right strand under the middle and then the left strand under the middle.
  6. Add more hair as you move along.
  7. Once you reach the end of the section, secure the braid with an elastic band.
  8. Now, braid the left side the same way and secure with another elastic band.
  9. Next, at the back of the right side, section a small piece and split it into three parts to start the braid.
  10. Moving up your head, cross the side sections back and forth under the middle section adding more hair as you go.
  11. Once you reach the top braid, carefully remove the elastic band and use it to tie the two sections together.
  12. Repeat the same steps on the left bottom side combining the top and bottom sections in the middle.
  13. Curl the resulting ponytails for added texture and elegance.
  14. Add hairspray to keep your double dutch braids looking fresh and stylish all day long!

Double Dutch Braid High Pony Tutorial

Image Source: Pinterest

  1. Brush your hair out thoroughly and create a horizontal part from ear to ear.
  2. Use an elastic band to keep the bottom section out of the way so you can concentrate on the front for now.
  3. Create a center part splitting the top section into two equal parts. Clip the left side out of the way.
  4. Starting at the side of the right side, pick up three small sections of hair to begin your braid.
  5. Begin braiding upwards by crossing first the right strand under the middle and then the left strand under the middle.
  6. Add more hair as you move along.
  7. Once you reach the center of your scalp, secure the braid with an elastic band.
  8. Now, braid the left side the same way until you reach the center of the center.
  9. Carefully remove the band on the right side and use it to tie together both sections of hair, creating a high ponytail.
  10. Pull the ponytail tightly upwards.
  11. Take a few strands of hair from the ponytail and wrap it around the elastic band.
  12. Secure it in the back using a hairpin.
  13. Bring out a few tendrils of hair to frame your face.
  14. Add hairspray to keep your double dutch braided style looking fresh and stylish all day long!

Double Dutch Braid Bouffant Tutorial

Image Source: Instagram

  1. Brush your hair out thoroughly and create a center part extending all the way down to the back of your head.
  2. Gather the top one-fourth center section of hair and clip away the rest out of the way.
  3. Starting at the top corner of the right side, pick up three small sections of hair to begin your braid.
  4. Begin braiding by crossing first the right strand under the middle and then the left strand under the middle.
  5. Add more hair as you move along.
  6. Position the braid towards the far side of the section instead of the middle.
  7. Continue braiding all the way until you reach the end of the section and then secure the braid using a clip.
  8. Repeat the same steps with the other section of hair.
  9. Use an elastic band to tie the braids together.
  10. Take a small section from the resulting ponytail and wrap the elastic band.
  11. Secure it in the back with a hairpin.
  12. Using a teasing comb gently lift the front middle section of hair between your dutch braids to your liking.
  13. Bring out a few loose tendrils to frame your face and the look is complete.
  14. Apply hairspray to keep your double dutch braids looking fresh and stylish all day long!

Double Dutch Braid Low Fishtail Bun Tutorial

Image Source: Instagram

  1. Brush your hair out thoroughly and create a center part extending all the way down to the back of your head.
  2. Use an elastic band to keep the left side out of the way so you can concentrate on the right side for now.
  3. Starting at the top corner of the right side, pick up three small sections of hair to begin your braid.
  4. Begin braiding by crossing first the right strand under the middle and then the left strand under the middle.
  5. Add more hair as you move along.
  6. Once you reach the end of your scalp, secure the braid with an elastic band.
  7. Now, braid the left side the same way stopping when you reach the nape of your neck.
  8. Secure with another elastic band.
  9. For each side, take a few strands of hair and wrap it around the elastic band.
  10. Secure it in the back using a hairpin.
  11. With the remaining hair, create a fishtail braid on each side.
  12. Secure the ends with an elastic band.
  13. Form the fishtails into a low bun using hairpins to hold sections in place as you go along.
  14. Apply hairspray to keep your double dutch fishtail style looking fresh and stylish all day long!

Undone Double Dutch Braid Tutorial

Image Source: Instagram

  1. Brush your hair out thoroughly and create a center part extending all the way down to the back of your head.
  2. Use an elastic band to keep the left side out of the way so you can concentrate on the right side for now.
  3. Starting at the top corner of the right side, pick up three small sections of hair to begin your braid.
  4. Begin braiding by crossing first the right strand under the middle and then the left strand under the middle.
  5. Add more hair as you move along all the way to the end of the hair.
  6. Secure the end using an elastic band.
  7. Repeat the same steps on the left side.
  8. The key to this style is to almost completely deconstruct the braids by loosening them with your fingers until they are extremely loose and fluffy.
  9. Apply hairspray to keep your double dutch braids looking fresh and stylish all day long!

Side Swept Double Dutch Braid Tutorial

Image Source: Pinterest

  1. Brush your hair out thoroughly and create a center part extending all the way down to the back of your head.
  2. Use an elastic band to keep the left side out of the way so you can concentrate on the right side for now.
  3. Starting at the top corner of the right side, pick up three small sections of hair to begin your braid.
  4. Begin braiding by crossing first the right strand under the middle and then the left strand under the middle.
  5. Add more hair as you move along.
  6. Once you reach the end of your scalp, secure the braid with an elastic band.
  7. Now, braid the left side the same way but bring the braid towards the right side as your braiding down.
  8. Once you reach the nape of your neck, carefully remove the band on the right side and use it to tie together both sections of hair on the right side.
  9. Take a few strands of hair from the ponytail and wrap it around the elastic band.
  10. Secure it in the back using a hairpin.
  11. Bring out a few tendrils of hair to frame your face.
  12. Tease the ponytail or curl for a trendy finish.
  13. Add hairspray to keep your double dutch braided style looking fresh and stylish all day long!

Double Dutch Braid High Bun Tutorial

Image Source: Instagram

  1. Brush your hair out thoroughly and create a center part extending all the way down to the back of your head.
  2. Use an elastic band to keep the left side out of the way so you can concentrate on the right side for now.
  3. At the back of the right side, section a small piece and split it into three parts to start the braid.
  4. Moving up your head, cross the side sections back and forth under the middle section, adding more hair as you go.
  5. Don’t worry if the braids are not perfect, it will add a chic quality to your style.
  6. Once you reach a little past the top of your ear, pull all the hair on the right side together.
  7. Secure with a clip.
  8. Repeat the same steps on the left side.
  9. Remove the clips from each side, combine all the hair together, and create a large messy bun.
  10. Secure using hairpins.
  11. Bring out a few tendrils of hair to frame your face.
  12. Add hairspray to keep your double dutch braids looking fresh and stylish all day long!

Double Dutch Braid Low Rose Lace Buns Tutorial

Image Source: Instagram

  1. Brush your hair out thoroughly and create a center part extending all the way down to the back of your head.
  2. Use an elastic band to keep the left side out of the way so you can concentrate on the right side for now.
  3. Starting at the top corner of the right side, pick up three small sections of hair to begin your braid.
  4. Begin braiding by crossing first the right strand under the middle and then the left strand under the middle.
  5. Add more hair as you move along all the way to the end of the hair.
  6. Secure the end using an elastic band.
  7. Now, wrap the braid around in a circular motion to create a bun, using hairpins to secure it as you go.
  8. Once secure, use your fingers to loosen the outer parts of the braid, ensuring it is slightly looser and fuller as it goes from the inside out. Use hairpins to keep everything in position.
  9. Repeat the same steps on the left side.
  10. Apply hairspray to keep your double dutch braids looking fresh and stylish all day long!

One-Sided Double Dutch Braid Tutorial

Image Source: Instagram

  1. Brush your hair out thoroughly and section off a medium section of hair from one side extending to the top of the ear.
  2. Use an elastic band to keep the remaining hair out of the way.
  3. Split the side section into two parts clipping one part of the way.
  4. Starting at the front of the loose section, pick up three small sections of hair to begin your braid.
  5. Begin braiding by crossing first the right strand under the middle and then the left strand under the middle.
  6. Add more hair as you move along.
  7. Once you reach the end of the section, secure the braid with an elastic band (optional: continue the braid to the end).
  8. Now, unclip the other section and repeat the same steps.
  9. Curl the resulting ponytails for added texture.
  10. Add hairspray to keep your double dutch braids looking fresh and stylish all day long!

Face- Framing Double Dutch Braid Tutorial

Image Source: Pinterest

  1. Brush your hair out thoroughly and create a center part extending all the way down to the back of your head.
  2. Use an elastic band to keep the left side out of the way so you can concentrate on the right side for now.
  3. Starting at the top corner of the right side, pick up three small sections of hair to begin your braid.
  4. Begin braiding by crossing first the right strand under the middle and then the left strand under the middle.
  5. Add more hair as you move along all the way to the end of the hair.
  6. The key to this look is positioning the braid going straight down the side of your face, so stretch the hair in the back to the very front.
  7. Secure the end using an elastic band.
  8. Repeat the same steps on the left side.
  9. Apply hairspray to keep your double dutch braids looking fresh and stylish all day long!

Double Dutch Braid Mohawk

Image Source: Pinterest

  1. Brush your hair out thoroughly and section off a medium section of hair from the front center extending all the way to the back of the head.
  2. Use an elastic band to keep the remaining hair out of the way.
  3. Split the center section into two parts clipping one part of the way.
  4. Starting at the front of the loose section, pick up three small sections of hair to begin your braid.
  5. Begin braiding by crossing first the right strand under the middle and then the left strand under the middle.
  6. Add more hair as you move along.
  7. Once you reach the end of the hair, secure the braid with an elastic band.
  8. Now, unclip the other section and repeat the same steps.
  9. Leave the remaining hair out or bring together into a ponytail for two different looks.
  10. Add hairspray to keep your double dutch braids looking fresh and stylish all day long!

Double Dutch High Reverse Braided Ponytail

Image Source: Instagram

  1. Brush your hair out thoroughly and create a horizontal part from ear to ear.
  2. Use an elastic band to keep the bottom section out of the way so you can concentrate on the front for now.
  3. Create a center part splitting the top section into two equal parts. Clip the left side out of the way.
  4. Starting at the side of the right side, pick up three small sections of hair to begin your braid.
  5. Begin braiding by crossing first the right strand under the middle and then the left strand under the middle.
  6. Add more hair as you move along.
  7. Once you reach the center of your scalp, secure the braid with an elastic band.
  8. Now, braid the left side the same way until you reach the center of the center.
  9. Carefully remove the bands on both sides and bring them and all the remaining hair together in the middle of the head.
  10. Use clips to help so the braids do not unravel.
  11. Secure with an elastic band.
  12. Braid the resulting ponytail and secure the end with an elastic band.
  13. Add hairspray to keep your double dutch braids looking fresh and stylish all day long!

Double Dutch Heart Braid Tutorial

Image Source: Pinterest

  1. Brush your hair out thoroughly and create a center part extending a few inches from the forehead.
  2. Part a small section hair from the end of the part going around the edge of the forehead creating a u-shape. Do this on both sides and secure with a clip.
  3. Gather the remaining hair in an elastic band to keep it out of the way.
  4. Starting at the end of the center part, pick up three small sections of hair to begin your braid.
  5. Begin braiding by crossing first the right strand under the middle and then the left strand under the middle,
  6. Add more hair as you move along the u-shape.
  7. Secure the end using a clip.
  8. Repeat the same steps on the opposite side.
  9. Bring the two braids together and secure with an elastic band creating a heart shape.
  10. Apply hairspray to keep your double dutch braids looking fresh and stylish all day long!

Give them all a try and let us know which one is your favorite! For any styles that require longer or thicker tresses, let Estelle’s Secret provide you with the highest quality human hair extensions on the market. Don’t forget to subscribe for more awesome tutorials!

Leave a Reply

Sign Up Now & Get Free Hair Tips

100% Secure. We never share your email.